
Table of Contents
- Start Here: The Five-Minute DMX Signal Check
- Step 1: Check DMX Cable Integrity and Continuity
- Step 2: Verify Fixture Addresses and Channel Mapping
- DMX Signal Termination Best Practices for Smart Light Rigs
- Step 3: Test Fixture DMX Mode and Refresh Rate Settings
- Step 4: Hunt Down Signal Interference and Ground Loops
- Step 5: Configure DMX Software for Smart Lights
- Step 6: Add a DMX Splitter or Amplifier to a Long Chain
- Frequently Asked Questions
Last Updated: September 14, 2026
Start Here: The Five-Minute DMX Signal Check
Most smart light DMX problems trace back to six causes: a bad cable, a wrong address, missing termination, a fixture stuck in the wrong mode, electrical noise, or a chain that has run too long. This guide walks through each in the order that finds the fault fastest.
Troubleshooting smart light DMX connections is a process of elimination. Start at the controller, work outward, and change one thing at a time.
What You'll Need Before You Start
- A known-good DMX cable to swap in
- A multimeter with a continuity setting
- Your fixture's DMX chart or manual
- A 3-pin to 5-pin turnaround if your rig mixes connector types
- Your console or DMX Smart Link open and patched
Keep a spare cable and terminator in your bag. Swapping a suspect part beats diagnosing it.

Step 1: Check DMX Cable Integrity and Continuity
A damaged cable is the most common cause of flickering and intermittent connections. DMX512 rides on shielded twisted pair, and a broken conductor or short between pins produces exactly the symptoms people blame on the software.
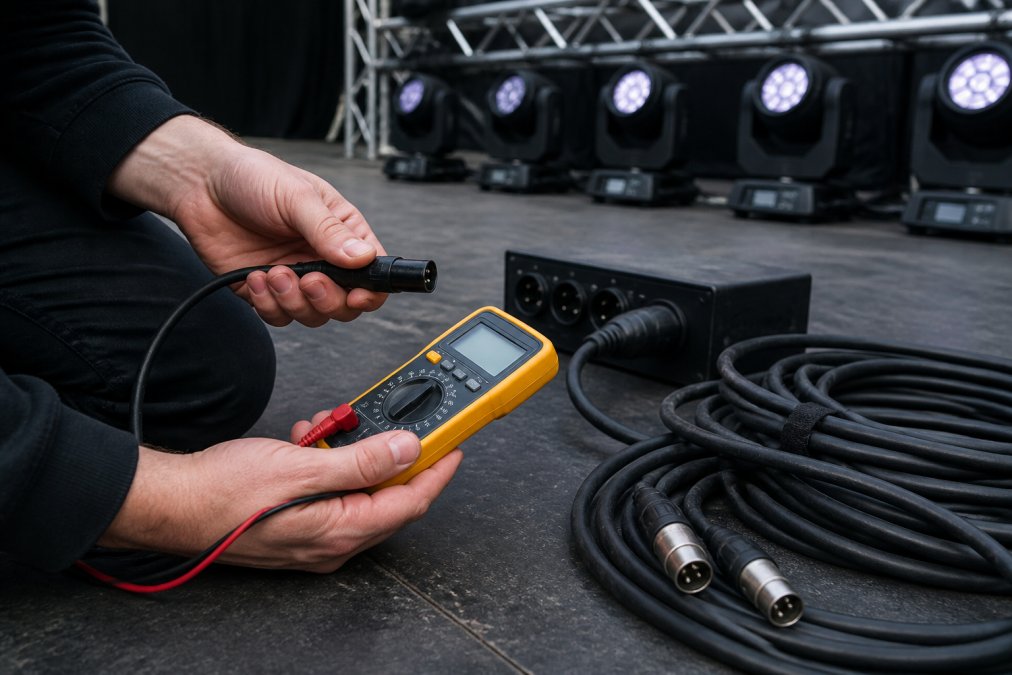
Set your multimeter to continuity and test pin to pin on both ends. On 3-pin XLR, check pin 2 to pin 2, pin 3 to pin 3, and pin 1 to pin 1. On 5-pin, pins 2 and 3 carry data and pin 1 is the shield. No beep means a broken conductor; a beep between pins that should not connect means a short. Then flex the cable while watching the meter, since intermittent faults often only show up when the cable bends.
Step 2: Verify Fixture Addresses and Channel Mapping
Wrong addressing is the second most common fault, and it produces a specific symptom: the fixture responds, but to the wrong commands. If fixture two follows the fader meant for fixture five, your address or channel mapping is off.
Every fixture needs a unique start address, and the address must match what your controller has patched. Check three things:
- The start address set on the fixture's display
- The DMX mode the fixture is in, since a 12-channel mode and a 6-channel mode occupy different address ranges
- The patch in your software, which must match both
The math that trips people up is daisy-chaining. If fixture one uses 12 channels starting at address 1, the next free address is 13, not 2. Add the channel count to the start address to find where the next fixture begins. Four identical par fixtures in 7-channel mode, patched back to back:
| Fixture | Channels used | Start address | Last channel |
|---|---|---|---|
| Par 1 | 7 | 1 | 7 |
| Par 2 | 7 | 8 | 14 |
| Par 3 | 7 | 15 | 21 |
| Par 4 | 7 | 22 | 28 |
Now swap Par 2 into 12-channel mode and leave its start address at 8. It occupies 8 through 19, swallowing the addresses Par 3 and Par 4 were using, so they misbehave whenever you touch Par 2's channels. This is the classic "my fixtures are possessed" call, and it is almost always a mode change never reflected in the patch.
A few habits prevent most of it:
- Set the mode on the fixture first, then patch.
- Leave a gap of at least one address between fixtures while building, then tighten it once everything responds.
- Tape the start address to the fixture.
- Keep a patch sheet listing fixture, mode, universe, and start address, and update it the moment you change anything.
Universe boundaries and smart light patching
DMX512 gives you 512 channels per universe. A fixture starting at 505 in 12-channel mode runs past the end of the universe, so the channels it needs do not exist. It responds to some commands and ignores others, which looks exactly like a bad cable. If a fixture misbehaves only on its higher channels, check whether it crosses the 512 boundary and move it to the next universe.
Smart lights add a second layer. A consumer smart light patched as a DMX fixture usually occupies a small channel block, often three channels for red, green, and blue, or four with a dimmer, so a single universe can hold a lot of them and it is easy to lose track. Two habits help:
- Group smart lights into their own universe rather than scattering them through your traditional fixtures, so you know which half of the rig to check when something misbehaves.
- Label each smart light in the patch with its physical location, not just its fixture number. "Stage left wash" is easier to find at 6 p.m. on a Sunday than "Fixture 47."
DMX Smart Link handles the patch for both fixture types in one place. It outputs DMX512, Art-Net, and sACN, and it drives Govee lights over the Govee cloud or the local network, plus anything exposed through Home Assistant or Homebridge, so your smart lights appear as real fixtures in the same patch as your traditional gear. That means one address list, one universe map, and one place to look when a fixture follows the wrong fader.
DMX Signal Termination Best Practices for Smart Light Rigs
DMX signal termination best practices come down to one rule: the last fixture in the chain needs a 120 ohm termination resistor across the data pair. Without it, the data packet reflects back down the line and corrupts the signal, showing up as random flickering that worsens as the chain gets longer. Terminate only the final fixture, since mid-chain terminators load the line and cause their own problems. Many fixtures have a built-in terminator switch, so check the menu before you dig out a plug.
DMX is a daisy-chain, not a star. Splitting the run with a passive Y-cable creates a stub that reflects signal. If you need to branch, use a proper splitter, covered in Step 6.

Step 3: Test Fixture DMX Mode and Refresh Rate Settings
A fixture in the wrong DMX mode ignores commands entirely or responds to only part of them. A fixture set to slave waits for another to lead it, so it never answers the console.
Open the fixture menu and confirm:
- The fixture is in DMX mode, not auto, sound-active, or master-slave
- The DMX mode matches your patch (channel count)
- If the fixture supports adjustable refresh rate, it is set to a value your controller can drive
Refresh rate matters more than most people expect. A fixture expecting a fast refresh can stutter on a slow output, and a low refresh setting can look steppy on fades. If a fixture works on one output and not another, compare refresh settings before blaming the cable.
Step 4: Hunt Down Signal Interference and Ground Loops
Interference and ground loops produce symptoms that come and go with no pattern, which makes them maddening. A ground loop happens when two pieces of equipment connect to different power sources and the voltage difference between them rides on the DMX shield as noise (pubmed.ncbi.nlm.nih.gov).
Common sources of interference on a lighting rig:
- Dimmer packs and LED drivers sharing a circuit with your data run
- Long parallel runs of DMX and mains power cable
- Unshielded or damaged cable acting as an antenna
- Cheap switching power supplies near the controller
The fixes are practical. Route data cable away from mains cable, never run them parallel for any distance, and power your controller and fixtures from the same distribution point where you can. If a ground loop persists, a DMX isolator on the line breaks the loop without cutting the data.
Step 5: Configure DMX Software for Smart Lights
Software-to-hardware handshake debugging is where most guides stop short, and exactly where smart light rigs fail. When a consumer smart light is patched as a DMX fixture, the software has to output correctly, the network has to deliver the data, and the device has to accept it. Any one of the three breaks the chain.
DMX Smart Link is a professional DMX lighting controller that also drives consumer smart lights, so it handles this handshake for you. It outputs DMX512, Art-Net, and sACN, and it drives Govee lights over the Govee cloud or the local network, plus anything exposed through Home Assistant or Homebridge, so your smart lights appear as real fixtures in your patch alongside your traditional gear.
For configuring DMX software for smart lights, work through it in this order:
- Confirm the software is outputting on the interface your hardware is listening to (Art-Net, sACN, or a physical DMX output)
- Confirm both devices are on the same network and subnet if you are running over IP
- Confirm the fixture is patched at the correct universe and address
- Confirm the device responds to a simple full-on command before you build anything complex
If the console sees the fixture but the light does not respond, the fault is on the network or the device, not in your patch. If the light responds but the console does not see it, check the output interface first.
Step 6: Add a DMX Splitter or Amplifier to a Long Chain
DMX512 has a practical limit of 32 devices on a single daisy-chain, and signal degradation grows with cable length. When a chain works at the first fixture but the last ones flicker or drop out, you have hit the limit of the run, not a bad fixture.
The reason is electrical. Each DMX receiver presents a load on the line, and the cable has capacitance that rounds off the fast edges of the data signal. Add enough receivers and cable, and the edges get soft enough that the last fixture misreads bits. That is why the fault shows up at the far end first.
A DMX splitter or amplifier solves this by taking one input and producing multiple isolated outputs. Each output becomes its own fresh chain, resetting the device count and cable length on every branch. This is also the correct fix for a star topology: instead of a Y-cable, run each branch from its own splitter output.
Splitter versus amplifier
The two terms get used interchangeably, but they are not the same job.
- A splitter takes one input and fans it out to several outputs. Each output is electrically isolated from the others, so a fault on one branch does not drag down the rest.
- An amplifier, sometimes called a repeater, takes one input and regenerates it to one output. It does not branch; it just cleans up and re-drives the signal so the run can continue.
If the chain is too long, an amplifier in the middle of the run fixes it. If you need to feed several directions or have hit the 32-device limit, a splitter is the right tool. Many rigs need both: a splitter near the controller to fan out, and an amplifier partway down the longest branch.
Where to put the splitter
Put the splitter near the start of the run and fan out from there. Running one long chain to the far side of the venue and splitting at the end does not fix the length problem, because the long run is still the long run.
A common pattern for a small venue:
- Controller output goes to the splitter input, on a short cable.
- Output 1 feeds the stage-left truss.
- Output 2 feeds the stage-right truss.
- Output 3 feeds the front-of-house wash positions.
- Output 4 stays spare, or feeds a follow-spot position.
Each branch now has its own device count and cable length budget. A flicker on stage left no longer takes down the front wash, and you can unplug a branch to work on it without killing the show.
Isolation is the part that matters
Optical isolation between outputs is what makes a splitter worth the rack space. It breaks ground loops between branches while cleaning up the signal. If two branches are powered from different circuits, an unisolated splitter passes the voltage difference between them straight down the data line, and you are back to the intermittent noise problems from Step 4. When shopping, look for per-output optical isolation, not just "isolated" on the box.
Terminate each branch
Termination rules do not change just because you added a splitter. Each output is its own chain, so each chain needs a 120 ohm terminator on its final fixture. A four-output splitter feeding four branches means four terminators. Skipping them puts you right back to the reflection problems from the termination section, and the symptom will look identical to the overload you just fixed.
The ENTTEC D-Split product page describes an optically-isolated 4-port splitter that handles exactly this job, giving you one input and four outputs with electrical isolation between them.
Frequently Asked Questions
Why are my smart lights not responding to DMX commands?
The most common causes are a wrong fixture address, a DMX mode mismatch, or a broken link in the daisy-chain. Check that each fixture's start address matches your patch sheet, confirm the fixture is set to the correct DMX mode, and verify the cable run from the controller to the first fixture. If you use a DMX Smart Link HUB, confirm the software is outputting on the correct universe and that the smart lights are patched to the right channels.
How can I test DMX connectivity without a console?
Use a handheld DMX tester or a simple DMX dongle connected to a laptop running diagnostic software. Set the tester to output a single channel at full and walk the chain fixture by fixture. If a fixture responds, the cable and address are good up to that point. You can also use DMX Smart Link on a laptop to send a test scene to one fixture at a time, which isolates the break quickly.
What is the role of DMX termination in a lighting rig?
A 120 ohm termination resistor at the last fixture in the chain absorbs signal reflections that would otherwise bounce back and corrupt the data packet. Without it, you may see flickering, erratic behavior, or fixtures that drop out when the chain gets long. Follow DMX signal termination best practices: one terminator at the end of the chain, never in the middle, and never on a splitter output that feeds another chain.
How do I fix flickering or erratic behavior in DMX fixtures?
Flickering usually points to signal degradation, interference, or a ground loop. First, check that the cable is shielded twisted pair and that the shield is not connected to ground at both ends. Second, separate DMX cables from AC power lines by at least a foot. Third, add a DMX splitter or amplifier if your chain exceeds 32 fixtures or runs more than 300 feet. If the flicker only happens on smart lights, verify the fixture's refresh rate matches your controller's output.
