
Table of Contents
- What You'll Need Before You Start
- DMX Console Setup: Hardware Console or Software?
- How to Patch Smart Lights Into DMX Consoles
- DMX Channel Mapping for Beginners
- The Best DMX Lighting Software for Small Churches
- Wiring, Signal Distribution, and Latency
- Budget Breakdown and Scalability Roadmap
- Volunteer-Friendly Workflow and Streaming Integration
- Frequently Asked Questions
Last Updated: September 12, 2026
What You'll Need Before You Start
A dmx console setup for church lighting needs four things: a controller, a DMX interface, cabling, and fixtures that speak the same protocol. This guide from DMXSmartLink walks through each piece in the order you'll need it.

Here's the honest starting list:
- A controller: either a hardware lighting console or a laptop running lighting software
- A DMX interface: the link between your controller and your fixtures (USB-to-DMX, or Ethernet-to-DMX via Art-Net or sACN)
- Cabling: DMX-rated XLR cable, plus a network switch if you're running Ethernet-to-DMX
- A terminator: a 120-ohm plug for the end of each daisy-chain
- Your fixtures: LED pars, moving heads, dimmer packs, or smart lights you want to control
- A show file plan: how you'll save and recall scenes so Sunday isn't a rebuild
DMX Console Setup: Hardware Console or Software?
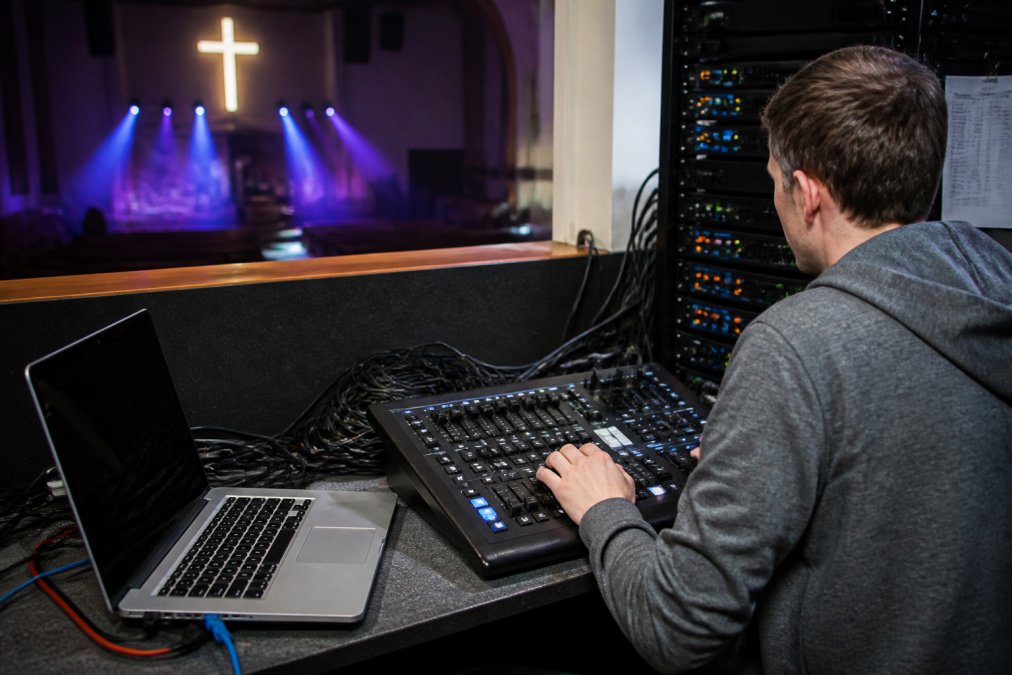
Software wins for most small churches: a laptop you already own plus a DMX interface costs far less than a hardware desk. Hardware consoles boot instantly and don't depend on an OS, but software gives you more channels, more flexibility, and easier scene management for the price of a dongle.
| Option | Typical Cost | Best For | Main Drawback |
|---|---|---|---|
| Hardware console | Higher upfront | Permanent installs, no laptop on site | Fewer channels at low price points |
| Lighting software + USB-to-DMX | Lower upfront | Small churches, volunteers, tight budgets | Depends on a working computer |
| Software + Ethernet-to-DMX | Moderate | Larger rigs, networked venues | Requires network setup knowledge |
For a few dozen fixtures, software is the practical choice, and it makes patching and channel mapping easier to teach a volunteer because everything lives on one screen.

Understanding DMX512 and Universes
DMX512 is the standard protocol that carries lighting control data from a controller to fixtures over a single cable. It sends 512 channels per universe, and every fixture listens for the channels you've assigned to it. You add universes when you outgrow the first one.
That limit sounds generous until you do the math: a 12-channel moving head eats 12 channels, so 40 fill a universe. For most church stages, one universe is plenty.
How to Patch Smart Lights Into DMX Consoles
Patching is where most church setups stall, because smart lights weren't built with DMX in mind: a consumer bulb or strip exposes controls through an app or local API, not a DMX512 input. The fix is a link that presents those fixtures to the console as standard DMX fixtures. DMXSmartLink does exactly this, patching smart lights into your console as real DMX fixtures alongside Lightkey, QLC+, grandMA, and any console that accepts Art-Net or sACN.
Before you patch anything, understand the two numbers that govern every fixture on the line:
- Start address: the first DMX channel a fixture listens to. A fixture set to start address 001 reads channel 1 first.
- Channel footprint: how many consecutive channels that fixture consumes. A 6-channel RGBW par set to start address 001 occupies channels 1 through 6, so the next fixture must start at 007 or higher.
Overlapping footprints are the most common patching error: two fixtures sharing a start address respond to the same fader, and it looks like a broken fixture. Confirm each fixture's start address equals the previous fixture's start address plus its footprint.
The patching sequence:
- Assign each smart light a unique DMX start address, leaving a gap of at least one channel between fixtures so you have room to expand a footprint later without re-addressing the whole chain
- Add the fixture to your console's patch list with the correct channel count and the matching fixture profile
- Map the smart light's controllable attributes (color, brightness, effects) to DMX channels in the control software
- Test each fixture individually before building any cues, bring up one channel at a time and confirm the right attribute responds
- Save the patch as part of your show file, and export a copy you can restore on a different machine
A worked example: three identical 6-channel RGBW pars and one 12-channel moving head.
| Fixture | Start Address | Channels Used |
|---|---|---|
| RGBW par 1 | 001 | 001-006 |
| RGBW par 2 | 007 | 007-012 |
| RGBW par 3 | 013 | 013-018 |
| Moving head | 019 | 019-030 |
That rig consumes 30 channels, leaving 482 free, which is why most church stages never need a second universe for control reasons alone.
DMX Channel Mapping for Beginners
Channel mapping decides which DMX channel controls which attribute, and getting it wrong causes "why is the red light doing the blue thing." Attributes map in a fixed order defined by the fixture's profile.
For a basic RGBW LED fixture, the mapping usually looks like this:
- Channel 1: master dimmer
- Channel 2: red
- Channel 3: green
- Channel 4: blue
- Channel 5: white
- Channel 6: strobe or effects
The fixture's manual is the only source of truth: two identical-looking fixtures can use different channel orders. Load the correct profile rather than guessing, and if a fixture behaves oddly, suspect the profile before the hardware.
The Best DMX Lighting Software for Small Churches
The best DMX lighting software for small churches runs on modest hardware, supports your interface type, and lets a volunteer recall a full service look with one press. Workflow matters more than channel count: a church rarely needs hundreds of channels but always needs Sunday to run without a technician.
DMXSmartLink fits that brief: it patches smart lights as real DMX fixtures, runs on Mac, PC, Pi, or Linux, and unifies DMX fixtures and smart lights in one dashboard. For a church juggling a lighting app and a console, that consolidation is the point.
Wiring, Signal Distribution, and Latency
Signal problems cause more show failures than software bugs, and they're almost always wiring. DMX512 is serial: the controller sends a continuous stream down a single pair of conductors, and every fixture reads the channels addressed to it. That's why cable layout matters as much as software configuration.
DMX runs over a daisy-chain, controller to fixture one, fixture one to fixture two, and so on, with a terminator at the end. Each fixture has a DMX in and out, and data passes through rather than branching. Skipping the terminator causes flicker that looks like a software fault: the unterminated end reflects signal back down the cable, and fixtures read it as corrupted data.
Key wiring rules and the reasons behind them:
- Use DMX-rated cable, not generic audio XLR, even though the connectors match. DMX cable is 120-ohm impedance; microphone cable is typically 50 to 75 ohms (belden.com). The impedance mismatch causes signal reflections over distance, which is why a run that works at 10 feet can fail at 100.
- Keep each daisy-chain under 32 fixtures. The DMX512 standard specifies a maximum of 32 unit loads per line. Each fixture presents a load to the signal, and beyond 32 the signal degrades past the point where fixtures can read it reliably.
- Terminate the last fixture in every chain with a 120-ohm terminator. A terminator is a plug with a single resistor across the data pair, and it absorbs the signal at the end of the line instead of letting it reflect.
- For long runs or many fixtures, split into multiple universes rather than stretching one chain. A DMX splitter takes one input and produces multiple isolated outputs, each of which can run its own daisy-chain up to the 32-fixture limit.
- Use a network switch for Ethernet-to-DMX distribution, and keep lighting traffic off your general church network. Art-Net and sACN are broadcast protocols, and a busy office network can introduce the kind of jitter that shows up as a visible stutter in a chase.
The DMX512 standard describes a maximum run of roughly 1,000 feet per line, assuming good cable and clean connections. Most church installs stay well under that and split into universes long before distance becomes the limiting factor.
Latency is rarely a problem with wired DMX, which updates all 512 channels many times per second, but it becomes one over Wi-Fi. Keep wireless smart lights on a dedicated access point that isn't serving phones and laptops, a dropped packet mid-service is far more disruptive than a slower scene change.
Budget Breakdown and Scalability Roadmap
Budget decisions stall small churches, because the smart lights were already a stretch. The control layer scales cleanly if you buy it once and buy it right.
| Stage | What You Add | Why |
|---|---|---|
| Start | Software + USB-to-DMX interface | Controls standard DMX fixtures with minimal spend |
| Grow | Smart light link | Adds consumer smart lights to the same rig |
| Expand | Second universe or Ethernet-to-DMX | Handles more fixtures and longer cable runs |
| Mature | Pro-grade buffered interface | Flicker-free control for demanding fixtures |
DMXSmartLink sells this as hardware kits: the Network Edition at $299, the Output Kit at $349, the Pro Output Kit at $449, and the Pro Dual I/O Kit at $649. Pick the Pro Dual I/O Kit to take a live DMX feed from an existing console and blend smart lights into it. There's also a free 14-day trial with no credit card required.

Volunteer-Friendly Workflow and Streaming Integration
Two things separate a church lighting setup that survives the year from one that collapses by March: a volunteer-runnable workflow, and lighting that looks right on camera as well as in the room.
Volunteer-friendly means scenes, not channels. Set the scene once, save it, and bring the whole rig back with one press: a saved scene captures your stage layout, fixture selection, and the full DMX frame for every universe. Nobody has to remember which channel does what on Sunday morning.
Streaming integration is the angle most guides skip. Camera sensors see color temperature and brightness differently than the eye, so a look that's perfect in the room can blow out on the stream (PubMed). Build separate in-room and broadcast scenes, and check them on an actual monitor. With an Elgato Stream Deck or YoloLiv YoloDeck, DMXSmartLink's HUB maps every saved scene to a physical key, so your volunteer triggers the stream look with one button.
Maintenance matters too: label every cable at both ends, photograph your patch list, and store the show file in two places. A documented rig takes minutes to fix; one that isn't takes an entire service.
Getting a church lighting rig to run reliably every week is less about buying the most gear and more about choosing a control layer that fits how your volunteers actually work. DMXSmartLink handles that control layer: it patches smart lights as real DMX fixtures, runs on Mac, PC, Pi, or Linux, supports Art-Net and sACN, and unifies your DMX fixtures and smart lights in one dashboard. Start the free 14-day trial, no credit card required, and get your Sunday lighting running on scenes instead of memory.
Frequently Asked Questions
How many DMX channels does each light need?
Most LED fixtures use between 3 and 12 channels depending on features. A basic RGB par takes 3 channels (red, green, blue). Add white for RGBW, plus dimmer, strobe, and pan/tilt if it's a moving head. A single DMX universe carries 512 channels, so you can run roughly 40-170 fixtures per universe depending on channel count. Plan your DMX console setup around total channel usage, not fixture count, so you don't run out mid-service.
What is the difference between DMX software and a hardware console?
A hardware console is a dedicated physical board with faders, buttons, and built-in DMX output. Software runs on a laptop, Mac, or Raspberry Pi and needs a USB-to-DMX or Ethernet-to-DMX interface to send signal. Software costs less, updates faster, and handles complex patching and cues well. Hardware feels more tactile and doesn't depend on a computer staying stable. Many churches run software for the main rig and keep a small hardware console as backup for Sunday mornings.
How do I integrate smart lights into a professional DMX setup?
You patch smart lights into your console as virtual DMX fixtures using a link tool. The link translates DMX channel values into commands the smart lights understand, so Govee or similar fixtures respond to cues, scenes, and faders just like stage fixtures. This eliminates app fumbling mid-show and gives you one unified dashboard. Look for a link that supports Art-Net and sACN, works with your existing software, and offers a free trial so you can test compatibility before committing.
What's the most affordable DMX console setup for a small church?
Start with software on a laptop you already own, plus a USB-to-DMX interface and a network switch if you're running Art-Net. The DMX Smart Link HUB Network Edition at $299 covers scene recall and smart light patching. Add the Basic DMX Output Kit at $349 if you need direct XLR output to standard fixtures. That's under $700 for a full rig, and you can scale into the Pro Output Kit at $449 or Pro Dual I/O Kit at $649 as your needs grow.
