
Table of Contents
- Why Smart Bulbs Work for Stage Lighting
- What You'll Need Before You Start
- Selecting the Right LED Bulbs for Your Venue
- Affordable DMX Lighting for Small Venues
- Step 1: Install and Network Your Smart Bulbs
- Step 2: Connect Your DMX Controller to Smart Lights
- Step 3: Create and Recall Scenes for Live Performance
- Using MIDI Controllers for Stage Lighting Control
- Frequently Asked Questions
Last Updated: September 20, 2026
Why Smart Bulbs Work for Stage Lighting
DIY stage lighting with smart bulbs costs less than traditional fixtures and integrates directly into modern control systems. A single smart bulb produces thousands of colors, adjusts brightness instantly, and responds to commands from your lighting console without extra wiring.
What You'll Need Before You Start
Before you assemble your first smart lighting rig, gather these core components. Each piece serves a specific function in your setup.
Smart bulbs and fixtures
Start with smart bulbs that support Wi-Fi or Bluetooth control. Govee smart lights offer strong brightness and color range. Look for bulbs rated for at least 1000 lumens on stage, anything less disappears under ambient light.
DMX controller and cabling
The DMX Smart Link HUB drives Govee lights, smart home devices, and standard DMX fixtures simultaneously.

Mounting hardware and ventilation
Use trussing, C-clamps, and adjustable stands to position fixtures at proper angles and heights. Ensure mounting hardware is rated for the total weight.
| Component | Purpose | Key Consideration |
|---|---|---|
| Smart bulbs (Govee or equivalent) | Color and brightness control | At least 1000 lumens for stage use |
| Par cans or floodlight housings | Shape and focus the light beam | Must have ventilation holes |
| DMX controller (DMX Smart Link HUB) | Unifies smart lights and DMX fixtures | Choose based on your fixture count |
| DMX cabling (5-pin XLR) | Connects console to controller | Keep runs short to minimize signal loss |
| Mounting hardware (truss, clamps, stands) | Positions fixtures at proper angles | Must support total weight safely |
| Ventilation enclosure design | Prevents thermal damage to bulbs | Never seal bulbs completely |
Selecting the Right LED Bulbs for Your Venue
For venues under 2,000 square feet, smart bulbs in the 800-1200 lumen range produce enough light to wash a stage or highlight specific areas. Govee smart bulbs integrate seamlessly with professional control systems.
Affordable DMX Lighting for Small Venues
Skip expensive moving head fixtures initially. Smart bulbs in par cans with affordable LED floodlights provide color flexibility and brightness control. Add moving heads later as budget allows.
Step 1: Install and Network Your Smart Bulbs
Start by physically installing your smart bulbs into their fixtures and mounting them on stage.
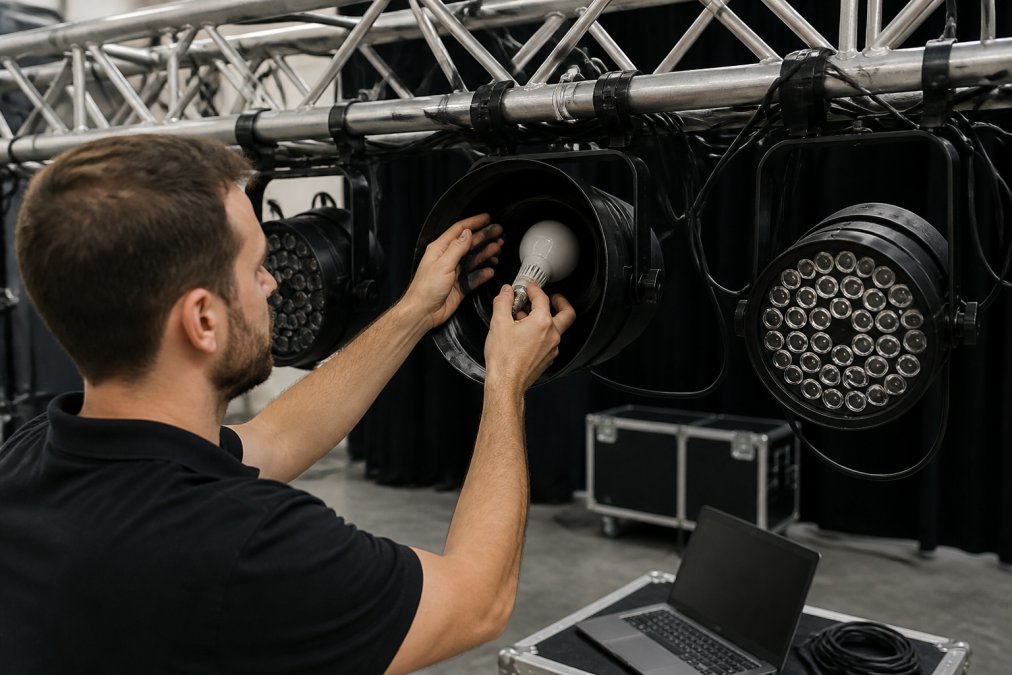
What You'll Need:
- Smart bulbs (Govee or compatible)
- Par cans or floodlight enclosures with ventilation
- Mounting hardware (truss, clamps, or stands)
- Wi-Fi network or Bluetooth connectivity
- Smartphone or tablet with the Govee app (for initial setup only)
Step-by-step:
-
Mount your fixtures first. Install your par cans and floodlight enclosures at the angles and heights you need. Use C-clamps, truss mounts, or stands depending on your setup. Make sure everything is secure before adding bulbs.
-
Install bulbs into fixtures. Screw your smart bulbs into the sockets inside each enclosure. Check that the bulb sits firmly and that ventilation holes aren't blocked.
-
Power on and test. Flip the circuit breaker or power switch to bring bulbs online. They should light up at full brightness. If a bulb doesn't light, reseat it in the socket and try again.
-
Connect to your network. Open the Govee app on your smartphone. Follow the in-app setup wizard to connect each bulb to your Wi-Fi network. This process takes about 30 seconds per bulb. Make sure your bulbs and your control computer are on the same network, they need to see each other.
-
Verify brightness and color. Use the Govee app to change brightness and color on each bulb. This confirms the bulb is responding to commands. Once verified, you won't need the Govee app again, your DMX controller will handle all commands.
-
Note the bulb names or IP addresses. Write down the network name or IP address of each bulb. You'll need this information when configuring your DMX controller.
Step 2: Connect Your DMX Controller to Smart Lights
Now link your lighting console to the DMX Smart Link HUB, which will control both your smart lights and any traditional DMX fixtures you have.
What You'll Need:
- DMX Smart Link HUB (Network Edition or Output Kit)
- Your lighting console (QLC+, Lightkey, grandMA, or any Art-Net/sACN-compatible software)
- DMX cables (5-pin XLR) if using Output Kit
- Computer running the DMX Smart Link software
- Your smart bulbs already networked from Step 1
Configuration:
-
Install DMX Smart Link software. Download and install the software on your control computer. If you're using the DMX Smart Link HUB hardware, the software comes pre-installed, just power it on and connect to it via your browser.
-
Add your smart lights to the software. Open the DMX Smart Link interface and select "Add Fixtures." Search for your Govee bulbs by their network names. The software will find them automatically if they're on the same network.
-
Assign DMX addresses. Each fixture needs a unique DMX address so your console knows which one to control. Assign your smart bulbs consecutive addresses starting at 1. If you have 10 smart bulbs, assign them addresses 1-10. Your traditional DMX fixtures get the next set of addresses (11 onward).
-
Configure your console output. In your lighting console, enable Art-Net or sACN output and point it to the DMX Smart Link software. The exact steps vary by console, but the principle is the same, tell your console where to send DMX data.
-
Test a single fixture. In your console, select one DMX channel and raise the fader. You should see the corresponding smart bulb brighten on stage. If it doesn't respond, check that your console and the DMX Smart Link software are on the same network.
-
Test color mixing. If your smart bulbs are RGB, select a bulb and change its color in your console. You should see the bulb change color on stage. If color doesn't change, verify that the bulb supports RGB control and that you've assigned the correct DMX channels for red, green, and blue.
Step 3: Create and Recall Scenes for Live Performance
A scene is a saved state of your entire lighting rig, every fixture at a specific brightness and color. Scenes let you recall complex lighting setups instantly during a performance.
Creating a Scene:
-
Set up your lighting manually. Use your console faders to position each fixture where you want it. Adjust brightness and color until the stage looks right. Take your time, this is your foundation.
-
Name the scene. In your DMX Smart Link software, click "Save Scene" and give it a clear name like "Verse 1 - Blue Wash" or "Spotlight Center Stage." Use names that make sense during a live show when you're reading them quickly.
-
Record the scene. Click the save button. The software captures the current state of every fixture, brightness, color, position, everything.
-
Create more scenes. Repeat this process for every major lighting change in your show. A typical 30-minute performance might have 8-12 scenes.
Recalling Scenes During Performance:
Use one of these methods to trigger scenes live:
-
Phone or tablet app: Open the DMX Smart Link app on your mobile device. Tap a scene name to recall it instantly. This works anywhere in the venue, you can walk the stage during the performance and adjust lighting from your pocket.
-
Elgato Stream Deck: Plug a Stream Deck into your control computer. Every saved scene appears as a button on the deck. Press a button to recall that scene. This is the fastest method if you're at a desk.
-
Lighting console faders: If your console supports scene recall, you can trigger scenes directly from your console's interface. This keeps everything on one device.
Using MIDI Controllers for Stage Lighting Control
MIDI controllers give you hands-on, tactile control of your lighting rig. A MIDI pad controller lets you trigger scenes with a single button press. MIDI faders let you ride brightness levels smoothly during a performance.
MIDI Pad Control:
MIDI Fader Control:
MIDI CC (Control Change) Mapping:
- CC 7 (Volume fader): Controls overall brightness level
- CC 20: Steps backward through scenes
- CC 21: Steps forward through scenes
Frequently Asked Questions
Can you use smart bulbs for stage lighting in a professional setting?
Yes. Smart bulbs like Govee fixtures deliver consistent color temperature, dimmable output, and RGB color mixing suitable for small theaters, churches, and DJ setups. They lack the heat sink and raw lumen output of traditional par cans, so they work best as accent or wash lighting rather than as your sole lighting rig. When controlled through a DMX controller, they integrate seamlessly with professional stage equipment, eliminating the need to fumble with individual app controls mid-performance.
How do I connect smart lights to a DMX controller?
Smart lights connect to a DMX controller through a software layer. The DMX Smart Link HUB translates DMX512 commands into Govee cloud or local network signals, presenting your smart bulbs as real DMX fixtures inside your console. This works with QLC+, Lightkey, grandMA, and other platforms via Art-Net or sACN. Once configured, your smart lights respond to faders, scenes, and cues just like traditional DMX fixtures.
What's the best way to create lighting scenes for live performances?
Create scenes by setting your smart bulbs to the exact color, brightness, and intensity you want, then save that state as a named scene in your DMX controller. During the performance, recall scenes with a single button press, footswitch, or Stream Deck key. This eliminates real-time adjustments and keeps your focus on the performance. Scene presets with fades allow smooth transitions between looks without jarring jumps in brightness or color.
What safety concerns should I address when using smart bulbs in an enclosed fixture?
Smart bulbs generate less heat than incandescent fixtures, but enclosed housings can still trap heat and cause thermal runaway if ventilation is blocked. Ensure your fixtures have adequate airflow, never fully seal a housing around an LED bulb, and check the bulb's wattage rating against your fixture's thermal limits. Use a heat sink rated for your bulb's power draw, and avoid stacking fixtures in tight spaces without clearance. Test your setup during soundcheck to confirm no fixtures are running excessively hot.
Building a professional lighting rig with smart bulbs and DMX control eliminates the chaos of app-switching mid-show. You get one unified interface that runs everything, smart lights, moving heads, conventional fixtures, all together. The DMX Smart Link HUB makes this integration straightforward for small venues, churches, and mobile DJs. Start your free 14-day trial at DMXSmartLink.com to see how it transforms your lighting workflow.
